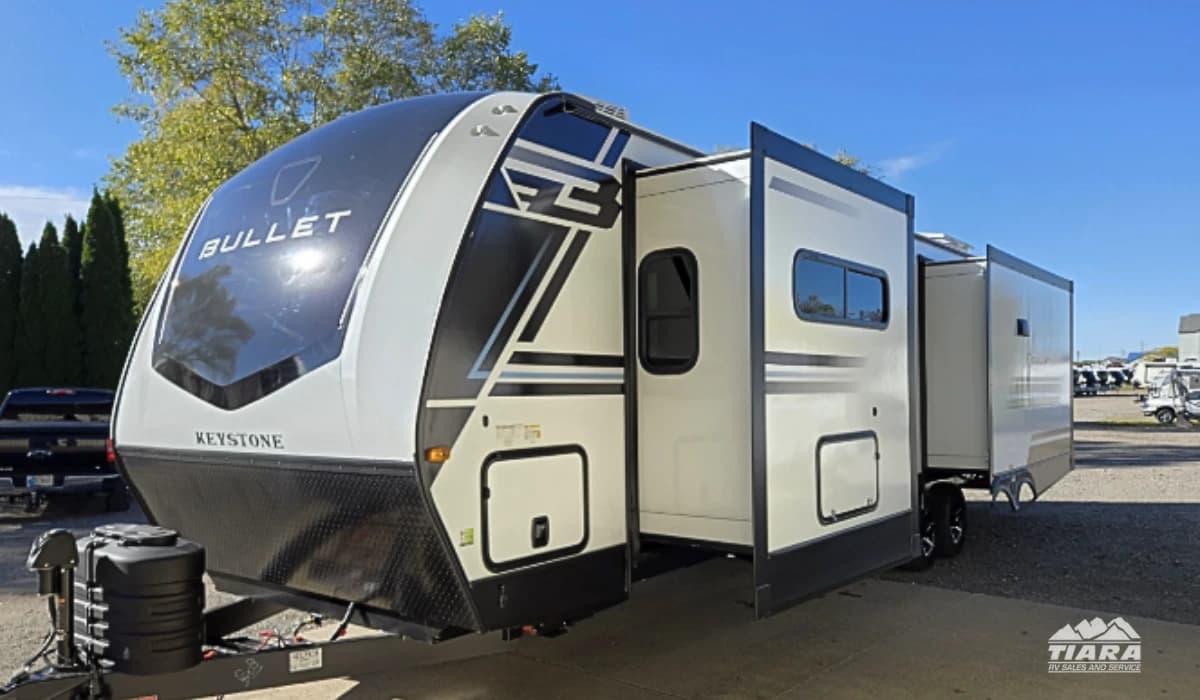
Memorial Day weekend is the unofficial start of camping season, and every year it catches a portion of RV owners underprepared. A travel trailer that sat through winter and a mild spring is not automatically ready for summer heat, long highway miles, and back-to-back weekends at capacity. The maintenance needs of summer camping are different from what most owners think about during spring de-winterization. Heat, UV exposure, and sustained use put stress on systems that cold weather leaves untouched. This guide covers the 10-point summer readiness checklist, how to handle the prep work yourself, and when to hand it off to a certified technician for RV parts in Elkhart and professional service.
How Summer Heat Affects Your RV Differently Than Winter Cold
Most RV owners understand the risks of freezing temperatures. Fewer understand how sustained summer heat degrades systems in ways that are just as costly if ignored. Before the checklist, it is worth understanding the mechanisms so the prep work makes sense.
Air conditioners run harder and longer in summer heat, which accelerates wear on compressors and capacitors. Absorption refrigerators lose efficiency in ambient temperatures above 90°F if airflow behind the unit is restricted. Awning fabric becomes brittle under prolonged UV exposure, making it prone to tearing at the seams exactly when it is used most. Roof seals expand and contract through heat cycles, which can open gaps that were sealed tightly in cooler months. Each of these is a pre-trip check item, not an in-season repair.
The 10-Point Summer Readiness Checklist
1. Inspect and Reseal the Roof
Walk the roof and inspect every seam, vent collar, antenna mount, and skylight edge. Heat cycles from the previous summer and the freeze-thaw of winter are the two most common causes of sealant failure. Look for cracking, lifting, or gaps. Any opening in the roof membrane is a water intrusion event waiting to happen. Use a sealant rated for your specific roof material — EPDM, TPO, and fiberglass each require different products.
2. Test the Air Conditioner Before Your First Trip
Do not wait until you are parked at a full campground in 90-degree heat to find out your AC is not cooling. Run the unit on shore power at home for 30 minutes and confirm it is reaching temperature. Clean or replace the air filter, inspect the shroud for cracks or storm damage, and clear any debris from the evaporator fins. A unit that struggles to cool on day one of summer will only get worse under sustained use.
3. Check Refrigerator Ventilation
Absorption refrigerators, which are standard in most travel trailers, rely on convection airflow through exterior vents to release heat from the cooling unit. If those vents are blocked by debris, wasp nests, or damaged vent covers, the refrigerator cannot maintain temperature in summer heat. Clear the lower and upper vents, confirm the vent covers open freely, and check that the interior temperature stabilizes within two hours of startup.
4. Inspect the Awning Fabric and Hardware
Extend the awning fully and inspect the fabric for UV brittleness, fraying at the edges, and any separation at the seam where the fabric meets the roller. Check the arms for smooth extension and confirm the tension adjustment is working. An awning that deploys awkwardly or has compromised fabric is a liability in any wind event. Replacement fabric is available through our RV parts department if yours needs attention before the season starts.
5. Sanitize the Fresh Water System
If you completed a full sanitization during spring de-winterization, verify that the system has not been sitting stagnant since then. Any trailer that has been stored with water in the lines for more than a few weeks should be sanitized again before use. A diluted bleach solution, a four-hour soak, and a thorough flush restores the system to potable condition. Replace the inline water filter cartridge at the start of each season.
6. Test the Battery Bank Under Load
A battery that passed a basic voltage test in the spring may not hold capacity under real summer use: fans running overnight, USB charging, water pump cycling, and slide-out operation across a weekend. Use a load tester to confirm actual capacity, not just resting voltage. Clean terminals, check cable connections, and confirm the battery charges correctly from both shore power and the tow vehicle while driving.
7. Inspect All Four Tires and the Spare
Check inflation, tread depth, and sidewall condition on every tire. Summer heat increases tire pressure, so check cold inflation before the trailer sits in direct sun. Look for ozone cracking on the sidewalls, which is accelerated by UV exposure. Confirm the date code on each tire — anything beyond five to six years should be replaced regardless of appearance. According to NHTSA, tire-related incidents are among the most common preventable RV road failures.
8. Test All Safety Devices
Before any overnight trip, confirm that the smoke alarm, carbon monoxide detector, and propane detector are all functioning. Replace batteries in all three. If any detector is more than five years old, replace the unit. Check the fire extinguisher charge level and confirm the pin and seal are intact. These take five minutes and are non-negotiable.
9. Check All Slide-Out Seals and Operation
Extend each slide fully and inspect the wiper seals on all four edges for cracking or compression failure. A deteriorated wiper seal allows conditioned air to escape and outside heat and moisture to enter. Lubricate the slide mechanism per the manufacturer's specification — most Keystone units specify a dry lubricant on the slide rails, not a petroleum-based grease. Confirm each slide extends and retracts smoothly without binding.
10. Verify the Hitch, Brake Controller, and Running Lights
Before the first tow of the season, confirm the hitch ball is torqued correctly, the coupler latch is functioning, safety chains are in good condition, and all running lights, brake lights, and turn signals are working on both the tow vehicle and trailer. Test the brake controller with a manual override at low speed. These are legally required systems and failing any one of them creates liability on the road.
DIY vs. Professional Pre-Season Inspection: Where to Draw the Line
The checklist above is achievable for most RV owners with basic tools and a few hours. But there are specific scenarios where a professional inspection is the smarter call, not because the task is necessarily complex, but because the cost of getting it wrong is disproportionately high.
- Propane system: Any leak test on the propane system should be performed by a certified technician. A missed leak is a life-safety issue, not an inconvenience.
- Roof damage beyond sealant: If you find soft spots on the roof decking or any evidence of membrane separation over a large area, a professional assessment is needed before you reseal over a structural problem.
- AC unit that fails to cool after cleaning: A refrigerant issue or failing capacitor requires certified HVAC service, not a DIY fix.
- Brake system irregularities: If the trailer brakes feel inconsistent, pull to one side, or fail to respond correctly to the controller, have them inspected before a highway trip.
KOA's seasonal maintenance guidelines echo this distinction: owner-performed visual checks and routine maintenance are encouraged, but system-level failures require professional diagnosis. Keystone also provides owner-specific maintenance resources through the Keystone RV owners portal.
Our RV service department offers pre-season inspections that cover every system in your travel trailer, performed by certified technicians with direct access to Keystone parts and factory support. If you want to browse new travel trailers heading into the summer season, our new travel trailer inventory is updated regularly.
Frequently Asked Questions
How do I prepare my travel trailer for summer camping?
Start with the systems most affected by heat: test the air conditioner, inspect roof seals, check refrigerator ventilation, sanitize the water system, and confirm tire condition. Then verify all safety devices, slide-out seals, battery health, and hitch components. A complete pre-season inspection covers all ten points before your first trip rather than discovering problems at the campground.
How often should I inspect my RV roof seals?
Roof seals should be inspected at least twice per year — once in spring before the camping season and once in fall before storage. In climates with significant temperature swings, a mid-summer check after peak heat is also worthwhile. Any seal that is cracking, pulling away, or no longer adhering to the substrate should be resealed immediately, regardless of when it was last addressed.
Why does my RV refrigerator struggle in summer heat?
Absorption refrigerators, which are standard in most travel trailers, rely on heat convection rather than a compressor to operate. When ambient temperatures exceed 90°F and exterior vent airflow is restricted, the cooling unit cannot dissipate heat efficiently and interior temperatures rise. Clearing the roof and lower vents, confirming the vent covers open fully, and parking with the refrigerator side of the unit in shade when possible all help. If the unit still cannot maintain temperature after addressing ventilation, the cooling unit may need service.
Do I need a professional RV inspection before summer camping?
Not necessarily for every item, but certain systems should be inspected by a certified technician at least once per season: the propane system, roof structure, brake system, and any appliance or electrical component that showed performance issues during the prior season. A full professional pre-season inspection is worth the time for owners who camp frequently, use their trailer for extended trips, or have not had a professional evaluation in more than a year.