Incorrect RV winterization is the most frequently cited cause of preventable spring repair events seen at RV service centers in Elkhart, and the two most common errors are choosing the wrong method for the unit's specific plumbing configuration and failing to isolate the water heater before beginning either method. Most owners approach winterization as a routine task when it is actually a sequenced procedure where order and method selection matter as much as completion. A unit that was "winterized" with the wrong antifreeze concentration, an incomplete blowout, or a bypassed step will pass visual inspection in October and present with cracked P-traps, a failed water heater element, or corroded tank sensors the following April. This guide covers the correct method decision, the systems that fail most often, and the professional service threshold that separates safe DIY territory from the steps where technician involvement prevents expensive downstream damage.
Winterization Method, Damage Prevention, and the DIY Threshold
Antifreeze vs. Air Blowout: Choosing the Correct Method for Your Plumbing Configuration
The choice between the compressed air blowout method and the antifreeze method is not a preference; it is a compatibility decision based on your unit's plumbing configuration, your storage climate, and the risk tolerance each method carries for your specific setup.
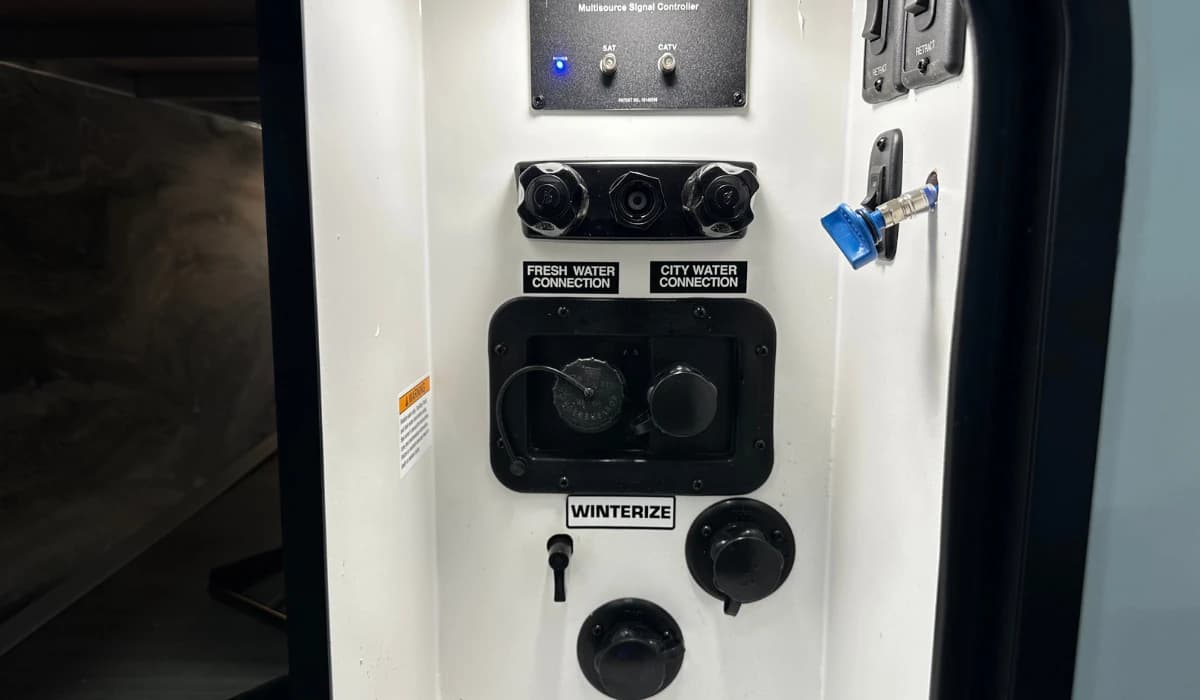
The compressed air blowout method uses regulated air pressure, typically between 30 and 50 PSI as specified by the unit's manufacturer, to force water out of the supply lines, fixtures, and low-point drains. It leaves no chemical residue, requires no spring flush before the first use, and works well for simple plumbing runs with direct line paths. The risk is in the word "complete." Air follows the path of least resistance. Units with complex plumbing configurations, multiple slides, extended line runs, or low-point traps positioned at angles where air pressure creates a pocket rather than a purge, can pass a blowout and still retain water in sections that freeze. The water heater must be bypassed and drained before any compressed air is applied. Running air pressure into a full tank risks damaging the anode rod fitting and the pressure relief valve.
The antifreeze method pumps RV-rated non-toxic propylene glycol through the system via a pickup tube at the freshwater tank. It provides more complete coverage in complex plumbing runs because fluid flows through every line regardless of path complexity. The trade-off is a thorough spring sanitization requirement before the system is used for drinking water, and owners who use the wrong antifreeze type create a more serious problem than the one they prevented. Standard automotive antifreeze is ethylene glycol and is toxic. Only RV-rated propylene glycol rated to the appropriate temperature threshold for your storage climate should enter the water system.
The most reliable approach for units with complex plumbing: blowout first to remove bulk water from main lines, followed by antifreeze through the low-point drains and P-traps that compressed air does not fully clear. Keystone specifies the winterization procedure for each model in the owner's manual; following that specification is the baseline for any warranty-related service work.
The Systems Most Frequently Damaged by Improper Winterization
Every spring service season, the same failure categories present at the service counter. Understanding what fails and why it fails helps owners identify whether their winterization process left a vulnerability before the damage becomes apparent.
Water heater elements dry-fired at spring startup are the most common preventable water heater failure in units that were winterized incorrectly. The failure sequence is consistent: the water heater bypass valve was not returned to the open position after winterization, the tank was not refilled before the system was powered on, and the heating element energized without water surrounding it. A dry-fired element fails immediately and irreversibly. The fix is procedural — bypass off, tank full, system pressurized before the water heater switch is touched — but the repair after the fact requires element replacement and sometimes tank inspection for stress damage.
Cracked P-traps from incomplete antifreeze fill are the second most common failure. P-traps in the sink, shower, and toilet drain system retain a small water column by design. If antifreeze does not reach each trap during winterization, that water column freezes, and the trap cracks along the curve where stress concentrates. Cracked P-traps do not always present dramatically — the crack may be hairline and allow slow seepage into the cabinet below rather than an immediate visible leak. By the time the cabinet floor softens, secondary water damage has already begun. The fix for each trap is straightforward; the secondary damage is not.
Battery degradation from storage without a maintenance charger was covered in the Fall Storage Prep guide, but it bears direct mention in a winterization context because the battery step is the one most commonly skipped when owners focus narrowly on the water system. A lead-acid battery stored at or below 12 volts sulfates progressively through the storage period. The capacity loss is often permanent by spring. A maintenance charger connected throughout the storage period prevents this entirely — it is a ten-dollar solution to a battery replacement event.
DIY vs. Professional Winterization: Where the Risk Threshold Is
Most of the winterization process is within reach of a capable owner who follows the manufacturer's documented procedure and approaches the task systematically. The water system blowout or antifreeze fill, the battery maintenance charger connection, the propane valve closure, and the visual exterior inspection are all DIY-appropriate steps. The decision to involve a certified technician is not about complexity — it is about the cost differential between a missed step and its downstream consequence.
The professional threshold arrives when any of the following conditions are present. First, when the owner is winterizing a unit for the first time and has not reviewed the manufacturer's specific procedure for their model — the sequence varies enough between plumbing configurations that a generic approach creates gaps. Second, when the unit has known plumbing complexity: multiple slides, an extended rear bathroom, or a second water source like an outdoor shower or ice maker line that is easy to overlook in a self-directed process. Third, when the unit is going into storage for more than five months, which extends the consequence window for any missed step significantly.
At Tiara RV, certified technicians perform winterization using the manufacturer-specific procedure for each unit, confirm bypass valve position, document completion, and flag any existing system issues discovered during the process. That documentation serves as both a service record and a baseline for spring startup. The cost of a professional winterization is a fraction of the cost of a single water heater element replacement or a P-trap failure that reaches the cabinet floor.
If you need antifreeze, bypass kits, or blowout adapters for a self-directed winterization, our RV parts department in Elkhart carries manufacturer-specified products for Keystone and other major brands. If you want a certified technician to perform or supervise the process, our RV service department schedules winterization appointments through the fall season.
Frequently Asked Questions
What is the correct way to winterize an RV?
Bypass and drain the water heater first — this step must happen before either method begins. Then choose between a compressed air blowout (best for simple plumbing runs in mild climates) or the antifreeze method (best for complex plumbing configurations and cold storage climates). Run each fixture in sequence until lines are clear or antifreeze flows through. Confirm low-point drain valves are opened and closed correctly. Connect a battery maintenance charger. Close the propane service valve. The manufacturer's owner's manual specifies the correct sequence and method for your unit — that document is the authoritative reference for your specific plumbing configuration.
Can I winterize my own RV or do I need a technician?
Most owners can complete a safe winterization by following the manufacturer's documented procedure precisely. The steps where technician involvement reduces risk are: first-time winterization without prior procedure review, units with complex or multi-zone plumbing configurations, and units storing for more than five months where the consequence of a missed step is compounded. A certified technician also documents completion and flags existing issues discovered during the process, which a self-directed winterization does not produce.
What happens if you don't winterize your RV properly?
Improperly winterized units present with predictable failures at spring startup: water heater elements dry-fired because the bypass was not reset, cracked P-traps from retained water that froze, corroded or inaccurate tank sensors from antifreeze concentration issues, and battery failure from storage in a discharged state. Each of these is preventable with a complete, correctly sequenced winterization. Each also requires professional service to repair — the repair cost in every case exceeds the cost of the winterization that would have prevented it.
Which RV antifreeze should I use for winterization?
Use only RV-rated non-toxic propylene glycol antifreeze rated to a temperature lower than your storage climate's expected low. The product must be specifically labeled for RV potable water systems. Do not use standard automotive antifreeze — ethylene glycol is toxic and not safe for water system contact. Confirm the temperature rating on the label matches your storage environment; a product rated to -20°F is appropriate for most Indiana storage conditions, but extended outdoor storage in extreme cold may require a lower-rated product.